In this lab, we’re going to learn about texture mapping — what texture coordinates do, how to set up the shaders to use textures, and how to manipulate the texture with the texture matrix.
Please download the code for the lab and go over the code.
Look though the code, paying particular attention to how the textures are being loaded. We’ll be editing main.cpp and the two .glsl files.
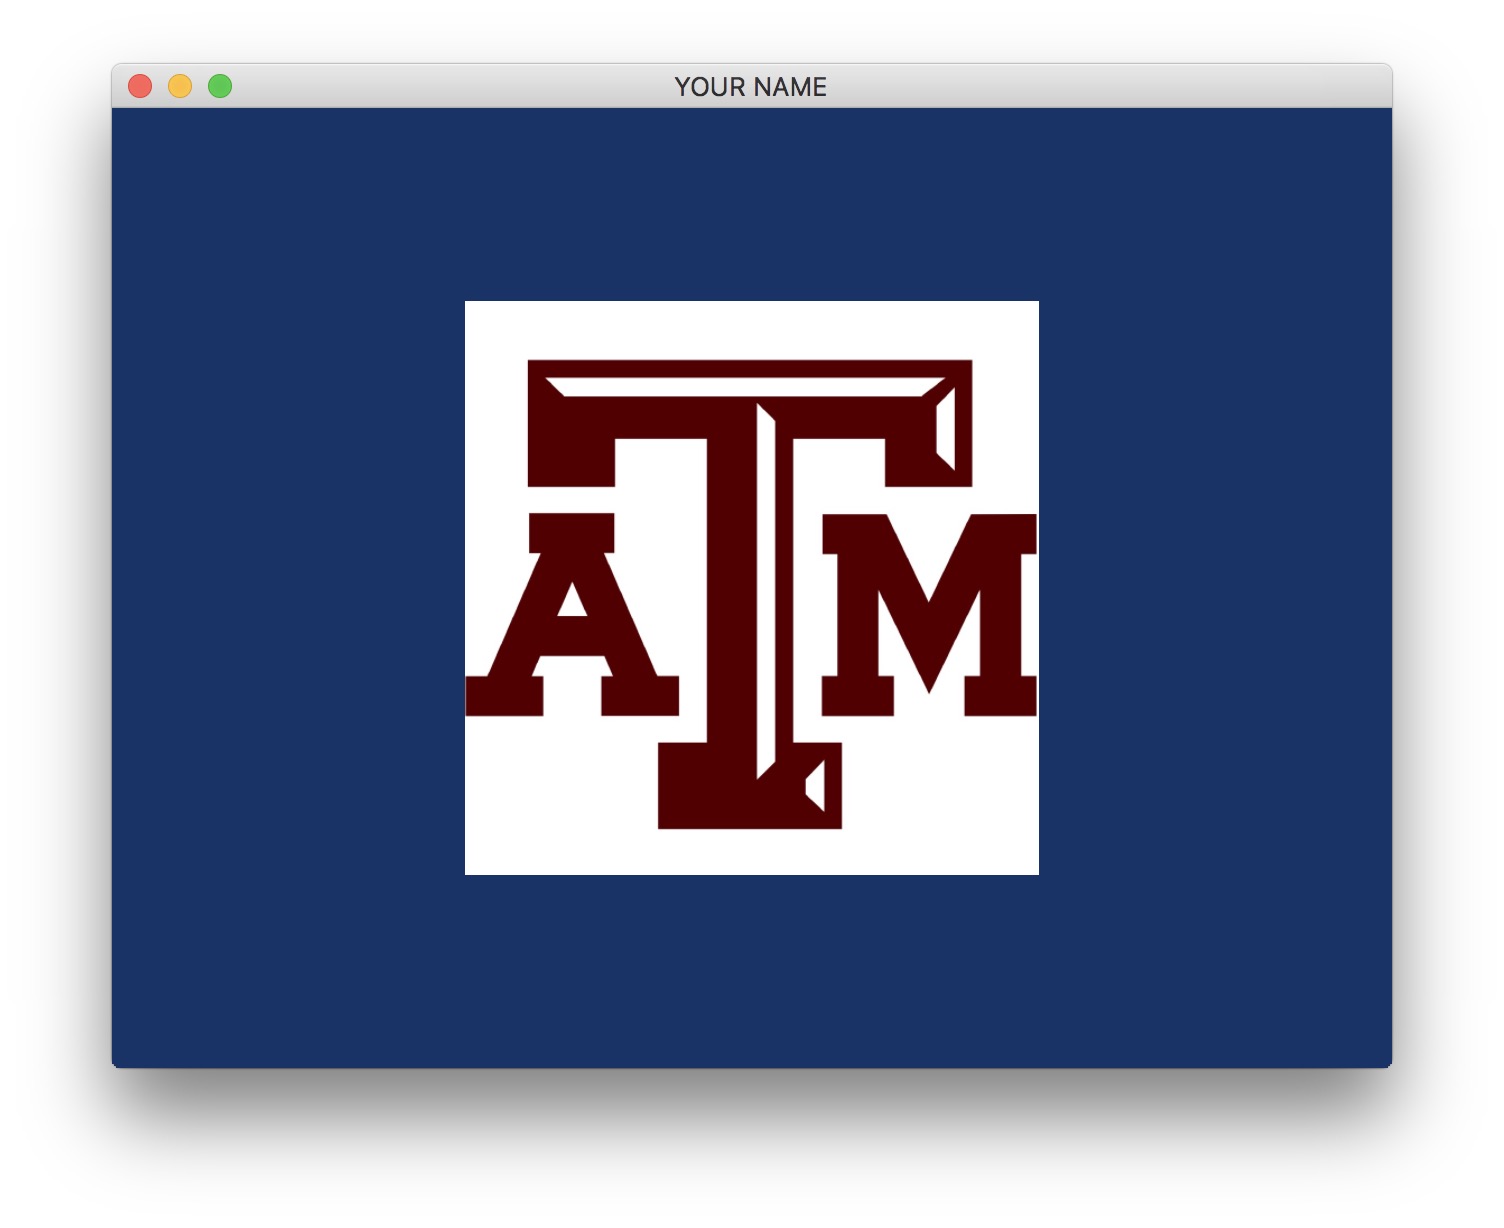
When you compile and run the code, you’ll get a blank square composed of two triangles. You can press the ‘w’ key to toggle on and off the “wireframe” mode in order to see the two triangles. The square is white because even though the texture is being loaded, the texture coordinates are all set to zero.
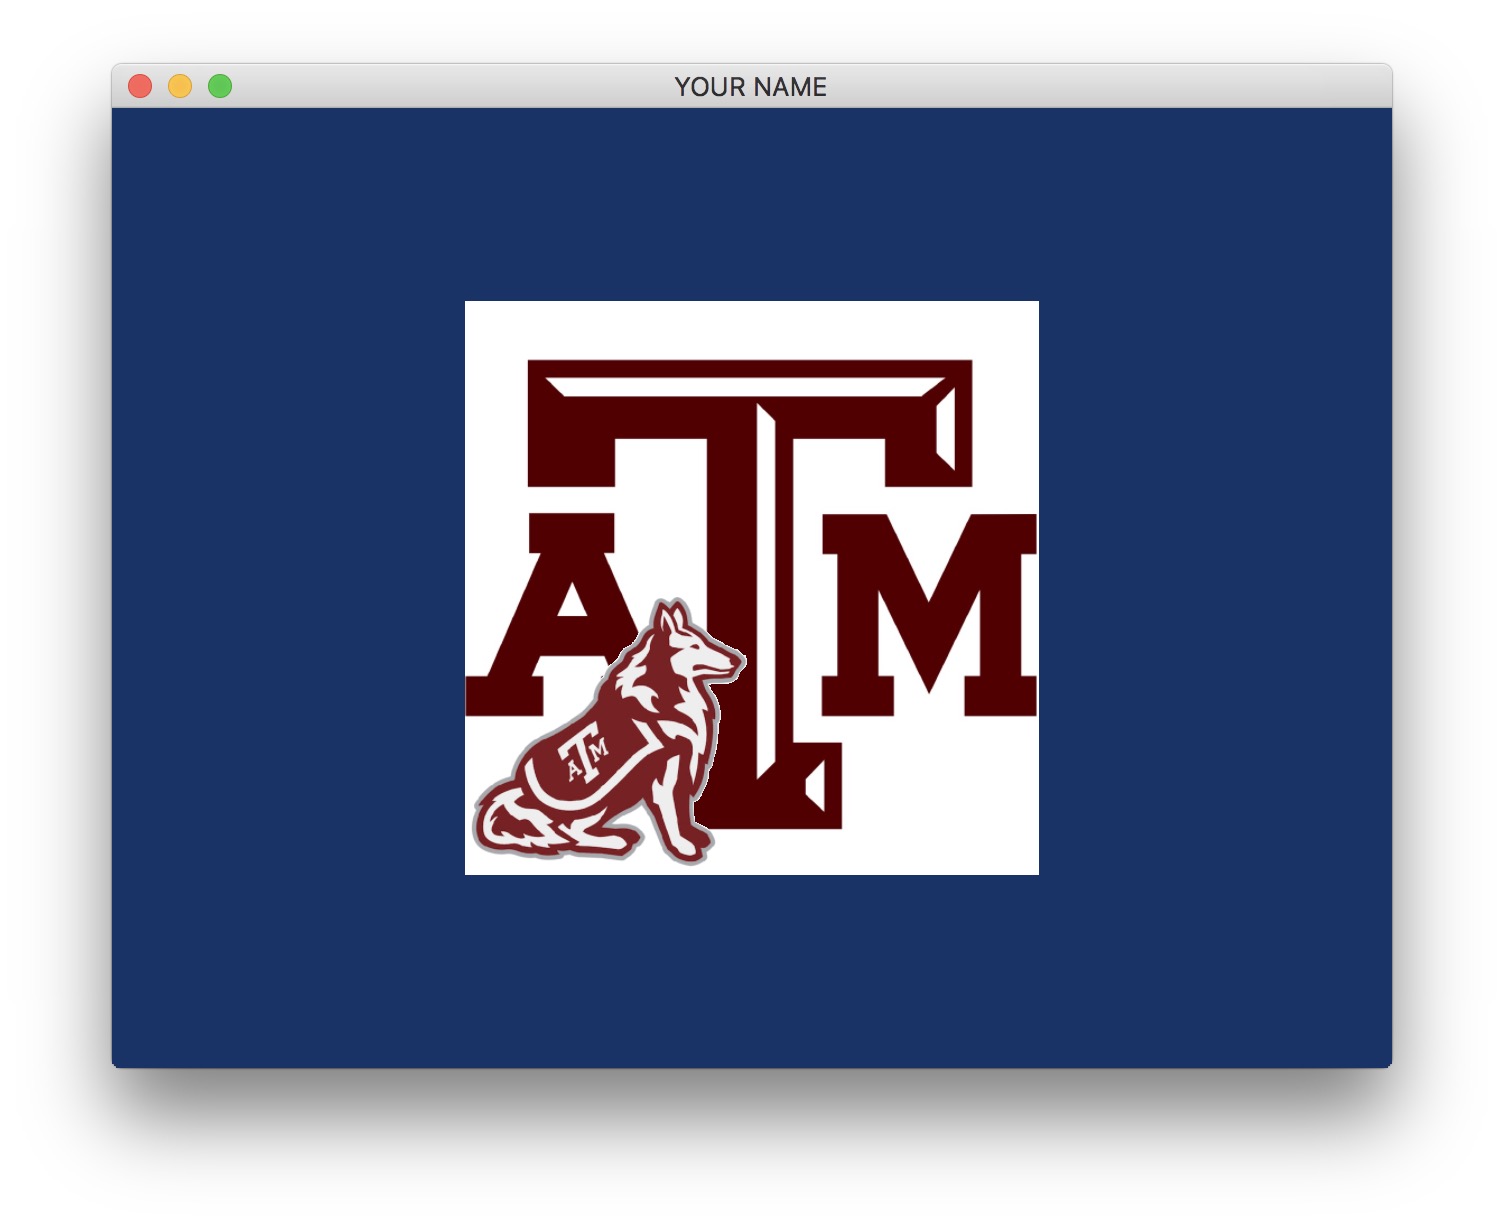
To see the texture properly, fix the texture coordinates of the four vertices of the square. Remember that the texture coordinates go from 0.0 to 1.0 in both S and T directions. (Many people use U and V for texture coordinates, but GLSL uses S and T.) Look at the two shaders to see how the texture coordinates are being passed from main.cpp to the vertex shader to the fragment shader. Once the texture coordinates are fixed, you should see the TAMU logo as shown here.
We are now going to add another texture to the same square. Edit the fragment shader so that the Reveille texture is overlaid on top. Assume here that the background color of the reveille texture is white (1.0, 1.0, 1.0). If the color of the Reveille texture is white, or close to white, then use the color from the original TAMU texture. Otherwise, use the color from the new Reveille texture.
We now want to make the Reveille look twice as small. There are three potential ways to do this. (1) Change the texture file. (2) Change the texture coordinates. (3) Use the texture matrix. The first approach is undesirable, since we don’t want to have to recreate the texture file every time we want to scale the Reveille. The second approach would be great, if we want fine-grained control, but this manual approach is very tedious. The third approach is the best, if we want a simple transform, such as a scale. So let’s take this approach. To do this, we have to modify main.cpp and the two shaders.
First, modify the vertex shader so that vTex1 is multiplied by the texture matrix, T1, rather than being passed straight through to the fragment shader. Note that the texture matrix is a 3x3 transformation matrix. Texture coordinates are points (not vectors), so you’ll need to add a 1.0 as the homogeneous coordinate to form a vec3. Also modify the fragment shader to use this new texture coordinates for the Reveille texture. Currently, the texture matrix is the identity matrix, so it does not have any effect on the texture coordinates.
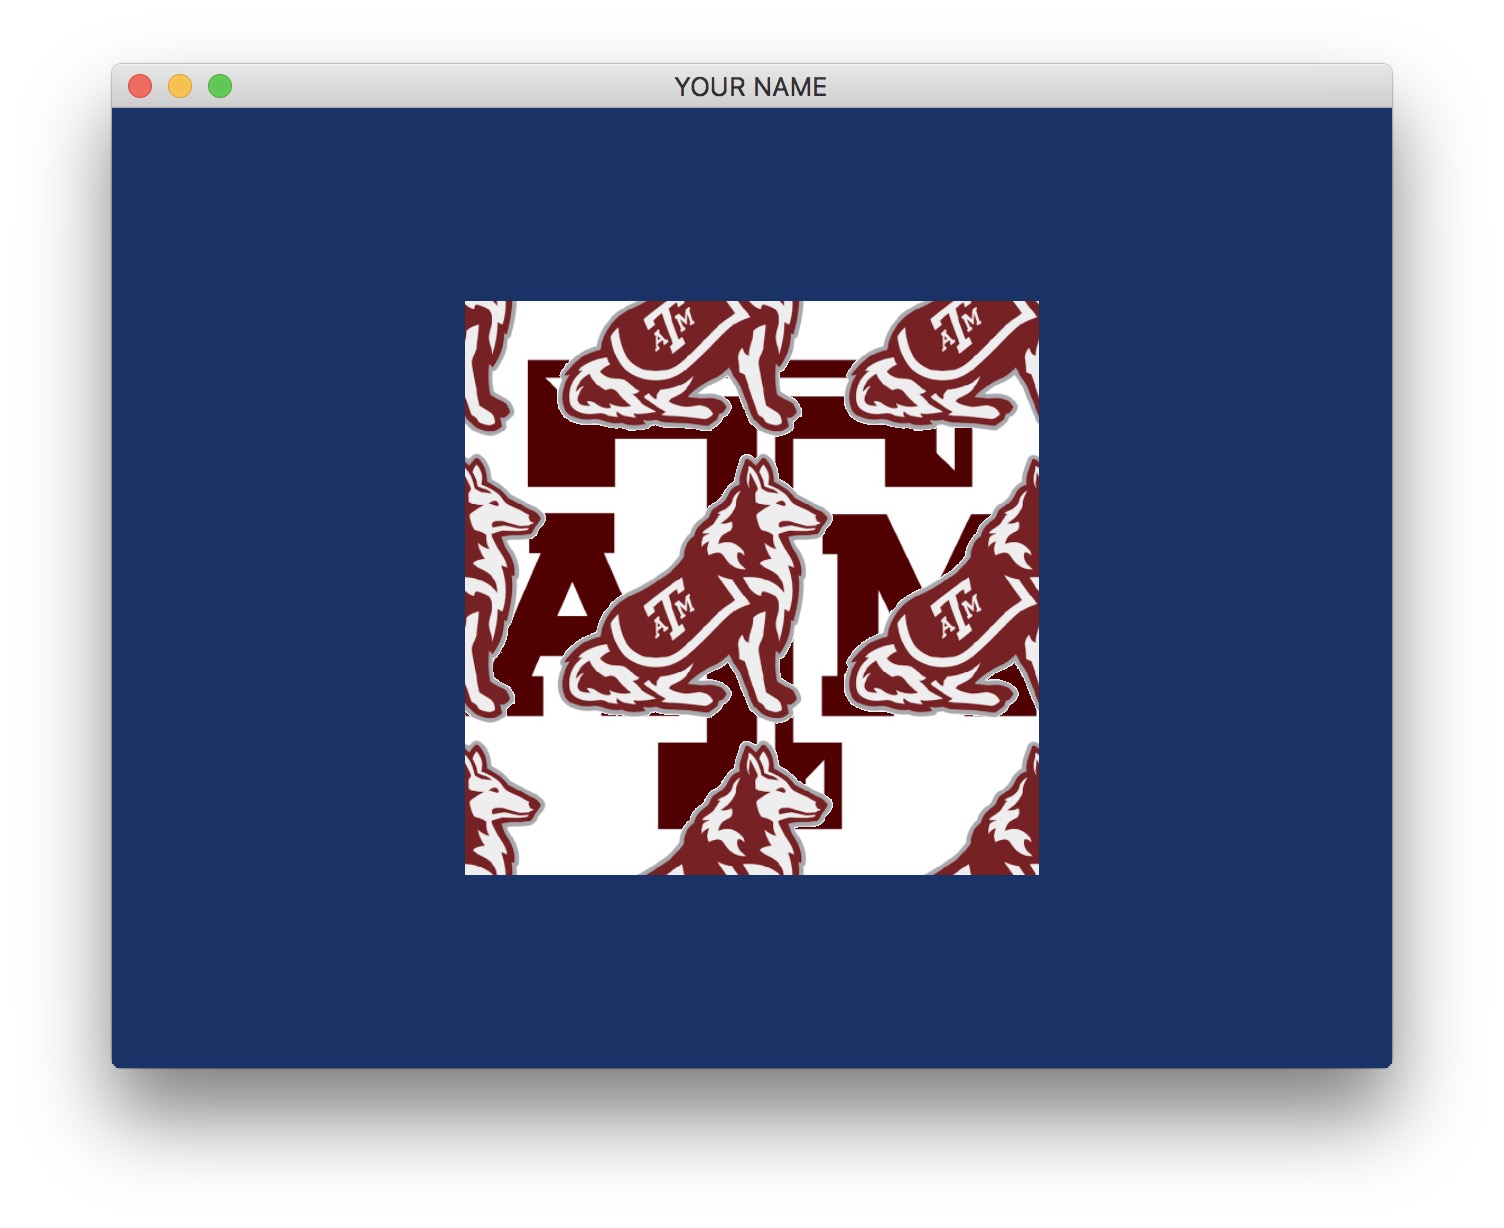
In main.cpp, modify the contents of the texture matrix in the init() function. The scaling factor we need to make the Reveille appear twice as small will not be what you expect. Make sure you understand why this is. Since the origin of the texture coordinates is at the lower left corner of the square, the Reveille will shrink to the lower left. This is ok for this lab. Also, don’t worry if you get a weird shade of gray in the rest of the square. We’ll fix this in the next step.
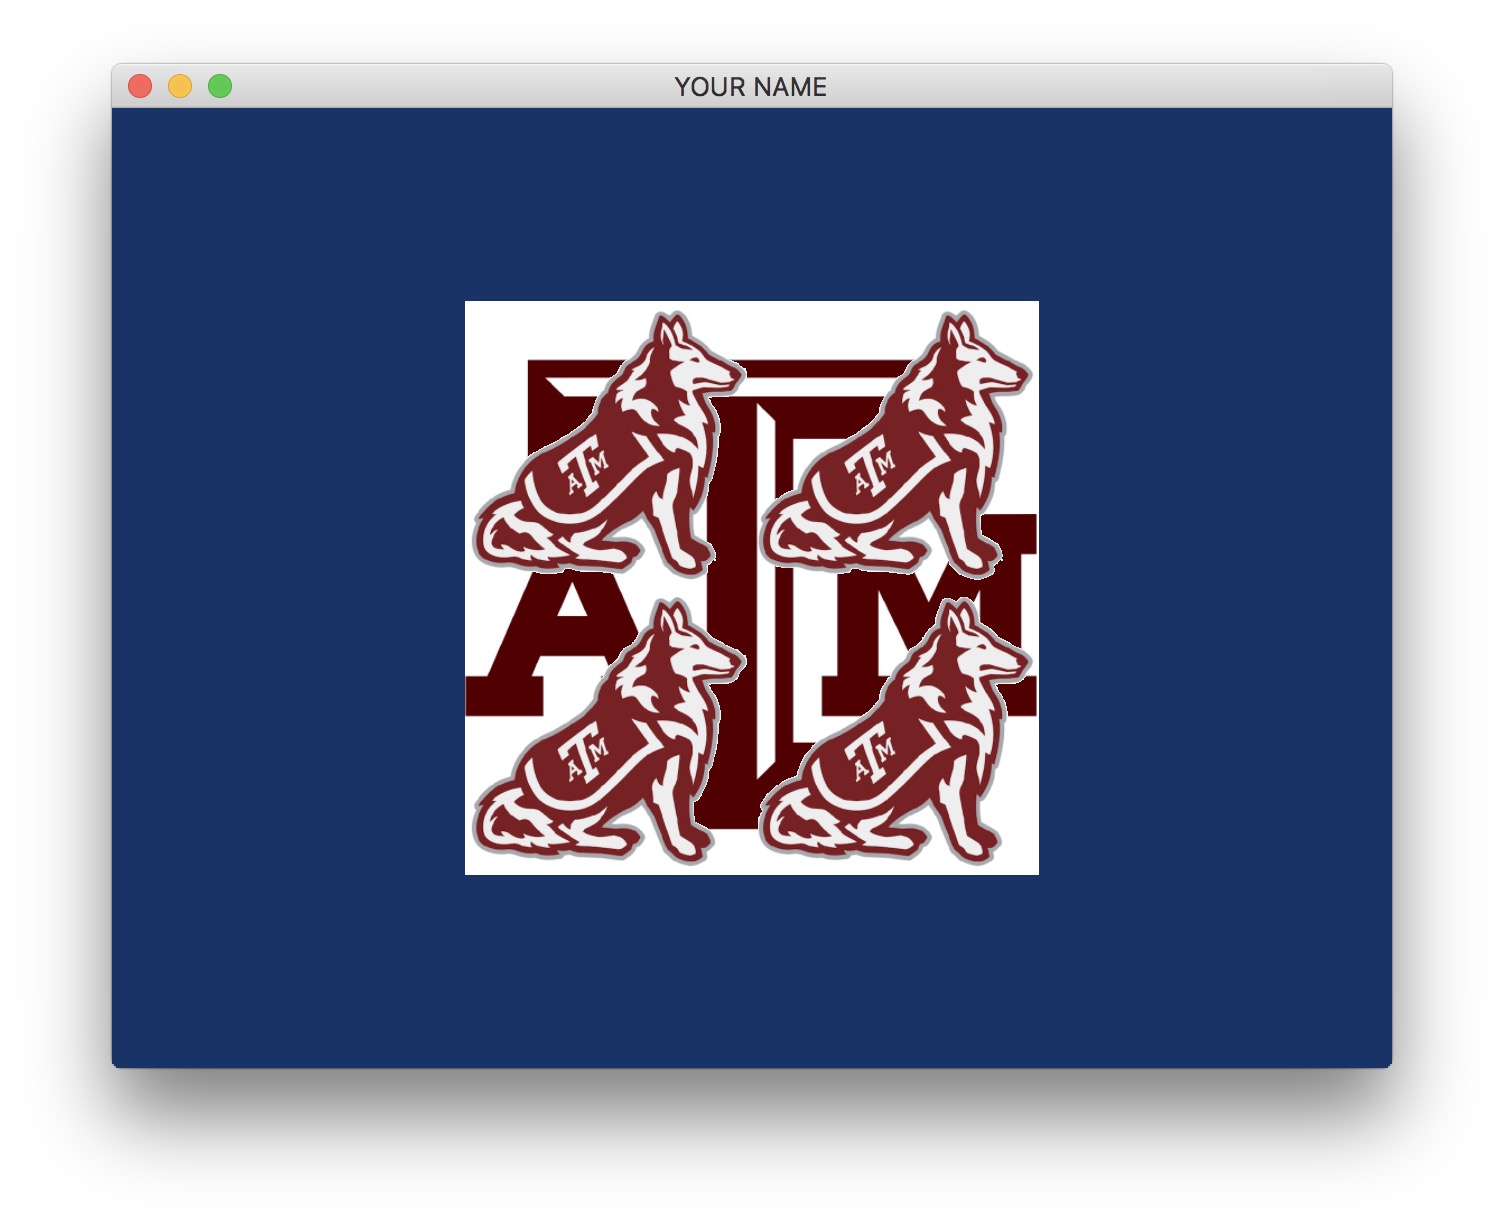
Make multiple Reveilles show up on the square by changing the texture wrap modes from GL_CLAMP_TO_EDGE to GL_REPEAT. This makes OpenGL repeat the texture outside of the 0 to 1 range, rather than clamping it.
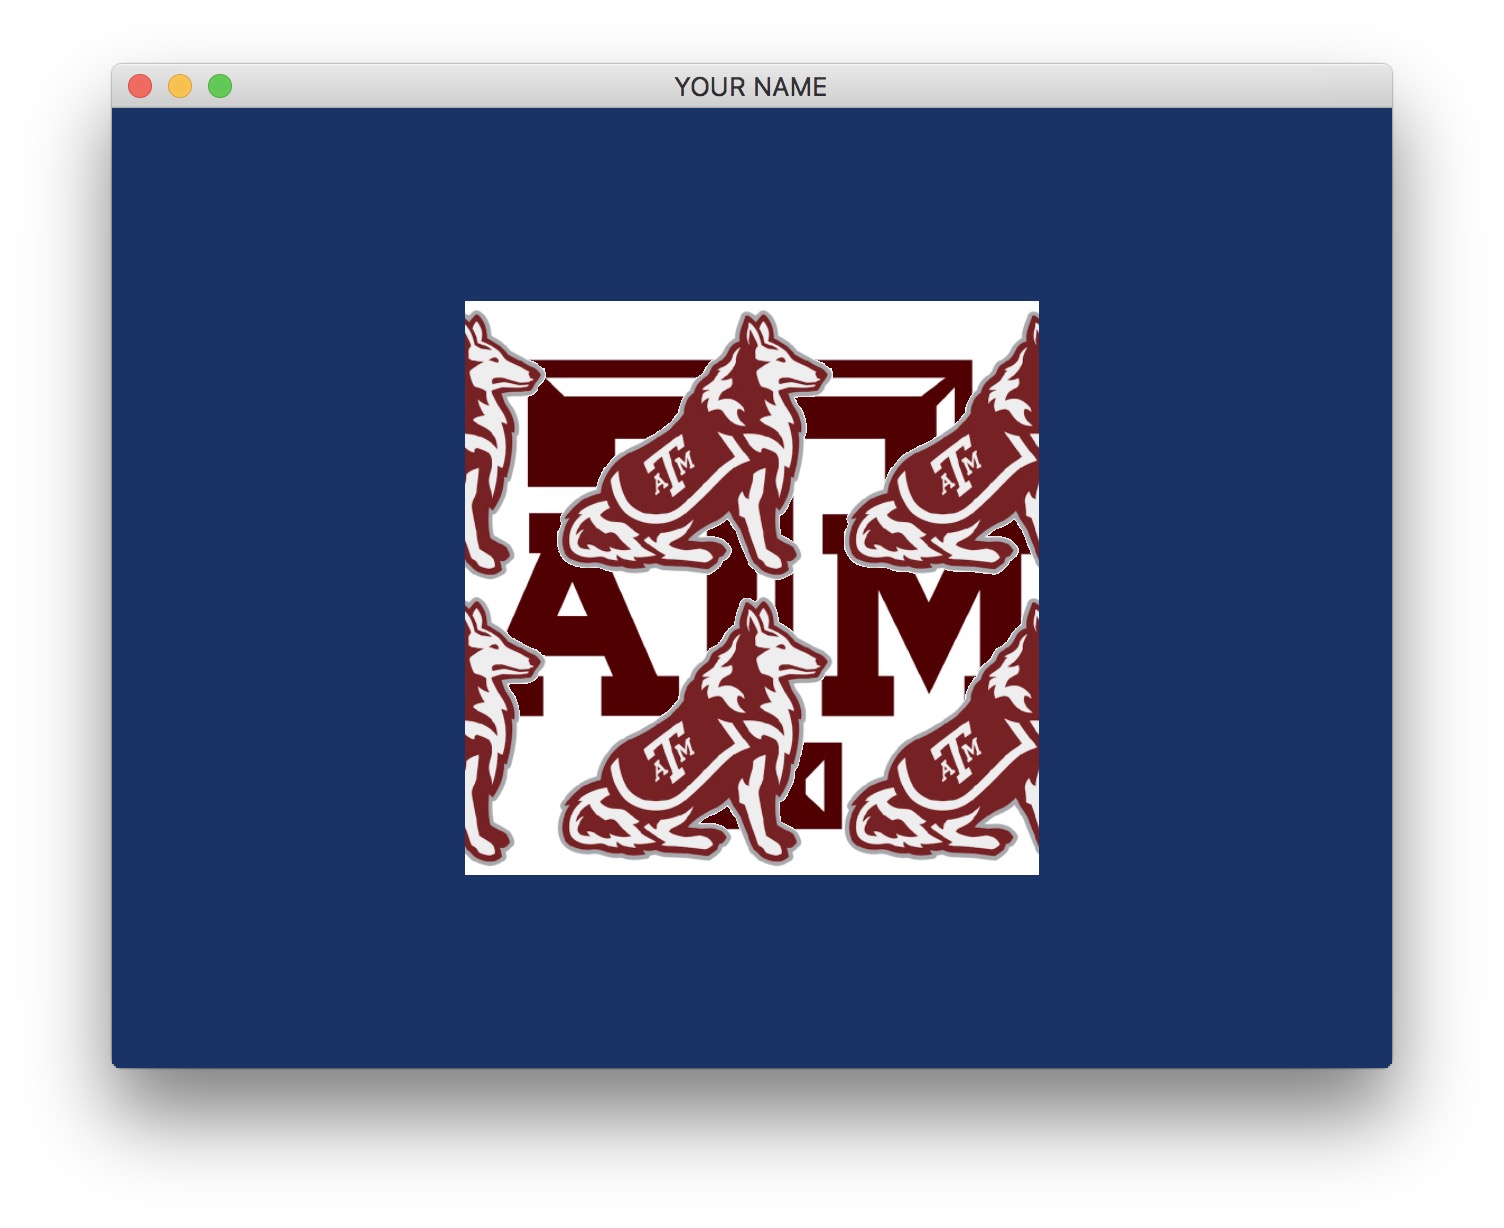
Finally, add a keyboard hook to make Reveille move to the right. You should do this by adding some code in the char_callback() function that modifies the texture matrix. The translation factors that you add should be small, around 0.05.