Lab Negative One - Setting up the development environment
IMPORTANT! In this course, your project must be cross-platform. Follow these guidelines.
Do not use system-specific headers and libraries (e.g., windows.h).
In your code, use forward slashes instead of back slashes for paths (/ instead of \).
When adding new cpp and h files, always add them manually to the src folder and rerun CMake. Do not use the “add” feature of your IDE to add files to your project.
Always use CMake to perform an “out-of-source” build, which means that the binary files will not be in the same directory as the source files.
Once you set up your environment properly, you should be able to run the lab code and see the following in the console:
Welcome to Computer Graphics!
First, download the lab here, and then extract the zip file to a suitable folder. Then go to the section corresponding to your development environment.
Depending on the environment, things may not go smoothly if the path contains special characters. Therefore, I recommend against using SPACE, &, etc. in your path.
Whenever you change your environment variables, you need to restart CMake and your IDE.
Because CMake caches your last-used settings, it must be cleared before running again. Run the command rm -r * from the build folder to delete the cache.
Make sure to download Visual C++, not just Visual Studio.
You may have to run Visual C++ at least once, before running CMake.
Some people have reported that they needed to also install “Build Tools For Visual Studio,” under “Other Tools and Frameworks” on the visual studio download page.
This is for macOS Catalina. Earlier versions may or may not work.
Download and install the following. You can use homebrew/macports or install these manually.
Xcode developer tools. You’ll need to log in with your Apple ID.
You may have to run Xcode at least once, before running CMake.
CMake (http://cmake.org/download/). Once installed, run the application and follow one of the three options listed under “Tools -> How to Install for Command Line Use”.
Make sure the commands g++ and cmake work from the command prompt.
Setting up Linux
This is for Ubuntu Linux 16.04.1 LTS. Setting up other distributions will be similar but may be slightly different.
You’ll need the following if you don’t have them already.
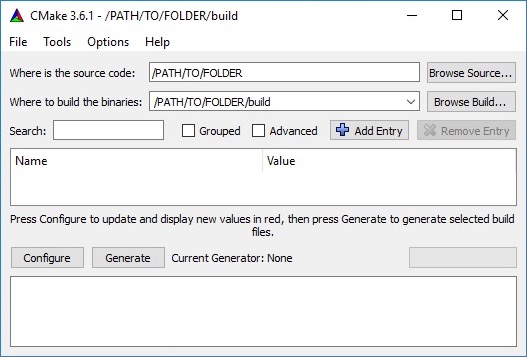
Click on “Browse Source…” and point to the folder you extracted, containing the CMakeLists.txt file.
Copy and paste the path from above to “Where to build the binaries.” Append “build” to it.
Click on “Configure.” Click on “Yes” if it asks if you want to create a directory. Select the Visual Studio version that is installed on your machine (e.g., “Visual Studio 16.2.5 2019”) and click on “Finish.” You should see “Configuring done” in the scroll panel.
Click on “Generate.” You should see “Generating done” in the scroll panel. Close CMake.
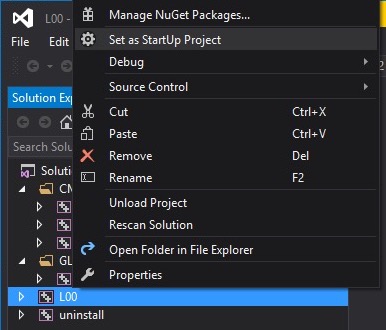
There should now be a file called L-1.sln in the build folder. Double click it to open it with Visual Studio.
Right-click on L-1 and select “Set as StartUp Project.”
Go to the “Build” menu and click “Build Solution [F7].”
Go to the “Debug” menu and click “Start Debugging [F5].” You should see the teapot.
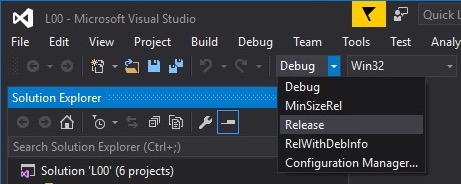
To run in Release mode, change the solution configuration by clicking on “Debug” in the drop-down menu.
Run with Xcode
Extract L-1.zip into a folder of your choice.
In the folder that contains CMakeLists.txt, run the following.
 > mkdir build
 > cd build
Then run the following from the build folder.
> cmake -G Xcode ..
This will generate L-1.xcodeproj project that you can open with Xcode.
Open L-1.xcodeproj with Xcode.
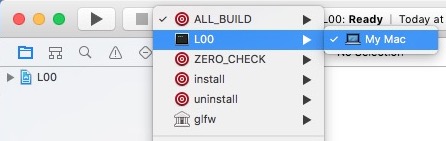
Change the target by clicking on “ALL_BUILD” and selecting L-1.
Press Command+B to build.
Press Command+R to run.
To run in release mode, edit the scheme again and go to the “info” tab.
Run with Makefile
Extract L-1.zip into a folder of your choice.
In the folder that contains CMakeLists.txt, run the following.
 > mkdir build
 > cd build
Then run the following from the build folder.
> cmake ..
This will generate a Makefile that you can use to compile your code.
To compile the code, run the generated Makefile.
> make -j4
The -j argument speeds up the compilation by multithreading the compiler. This will generate an executable, which you can run by typing
> ./L-1
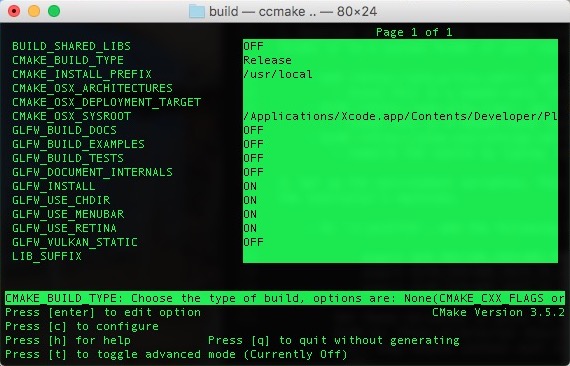
To build in release mode, use ccmake .. and change CMAKE_BUILD_TYPE to Release. Press ‘c’ to configure then ‘g’ to generate. Now make -j4 will build in release mode.